Mostrando entradas con la etiqueta Spanish Tutorials. Mostrar todas las entradas

lunes, 28 de septiembre de 2009

Tut "Blue Stars"


For this tutorial you will need the following things:
First of all the beautiful scrap kit from Tina's Magical Creations, called "Black Blue Star", is a PTU and you can purchase the kit HERE and HERE.
The tube is a beautiful ©Suzanne Woolcott girl, you can purchase her art HERE.
The bling you can download HERE.
Let´s begin:
1.- Open a new raster layer of 500 x 500 pixeles. Fill with white colour.
2.- Now copy and paste as new layer Glimmerstar 2, resize to 50%, and move one below the other, see my tag for help.
3.- Copy and paste as new layer Dazzlinflower 1 and Dazzlinflower 2, reszise to 50%, put them as you can see in my tag.
4.- Copy and paste as new layer Starframe 15, resize to 50%, now with your magic wand select into the frame, copy and paste as new layer Paper 24, and resize to 50%. Now go to selection/modify/expand 4, now go to selection/invert and then edit/cut. Now move the layer below the frame layer.
5.- Copy and paste as new layer Starstring 1, resize to 40%, now do the same with your Stardoublebow1, resize to 25%. Apply drop shadow of choice.
6.- Copy and paste as new layer Glitterstardoddle 1. Resize to 50%, and move below your frame background, then duplicate this layer and put both as you can see in my tag. Apply droop shadow of choice.
7.- Now merge all visible layers. Copy and paste as new animation in your Animation Shop. Duplicate two times this frame. Now open your bling, resize the animation to 65%, and join together both animations as you do always in that cases.
8.- Now add your name and your licence number in the same way.
9.- Save as gif.
It's done.
I hope you like this tut.

I love to see all your results, if you want you can send me your tags with the results of my tuts to: newartisticdreams@gmail.com

Thank you for try this and the others tuts.

This tutorial was writting by me, Mariel - ©Artistic Dreams on 28th of september of 2009 any resemblance to any other tutorial is completely coincidental

Mariel - ©Artistic Dreams

domingo, 27 de septiembre de 2009

Tut "Thoughts of Autumn"

For this tutorial you will need the following things:
First of all the beautiful scrap kit from Gemini Creationz, called " Thoughts of Autumn", and you can purchase the kit HERE.
The beautiful tubes are from ©Suzanne Woolcott and you can purchase her tubes HERE.
The template # 16 rom Babe's Designz you can download HERE.
Let's begin:
1.- Open your tamplate in your PSP, duplicate and close the original.
2.- First delete the credits layer. Now select two paper from your kit and apply to the background layers.
3.- Copy and paste four new papers for all the other layers of your template, look in my tag result and use the same papers or other you want from your scrap kit.
4.- Copy and paste as new layer Bark, resize to convenience, and do the same with the leaf, and duplicate the leaf layer once and reflet. Put them as you can see in my tag, then copy and paste as new layers both ©Gorjuss tubes, and apply drop shadow of choice. Now copy and paste as new layer Deco, resize and duplicate twice, now put them as you can see in my tag.
5.- Copy and paste all the other elements: Mushrooms, Scarecrow, clock, acorn (duplicate once and reflet, then put them as you can see in my tag), pumpkins. Apply drop shadow of choice.
6.- Now merge all the visible layers, and add your licence number.
7.- Write your name, I used font: Portfolio, size 48, with two colours who match with your tag.
8.- Save as png.
It's done.
I hope you like this tut.

I love to see all your results, if you want you can send me your tags with the results of my tuts to: newartisticdreams@gmail.com

Thank you for try this and the others tuts.

This tutorial was writting by me, Mariel - ©Artistic Dreams on 26th of september of 2009 any resemblance to any other tutorial is completely coincidental.

Mariel - ©Artistic Dreams

sábado, 26 de septiembre de 2009

New Spanish Tutorial with my Twilight Scrap Kit from Maryana!!! Thank you!!!


This is the new tutorial from Maryana in MYM Tutoriales, you can follow this tut in spanish in our blog HERE.
Thank you Maryana for used my kit for this wonderful tutorial.
The kit is HERE in my blog.
Hugs and kisses,
Mariel - ©Artistic Dreams

Tut "Gold Tag"


For the following tutorial you will need:

The beautiful scrap kit Freebie from Shineangel Création, called "Splash of Gold", you can download HERE.

The beautiful ©Gorjuss tube from Suzanne Woolcott, you can purchase her art HERE.

The mask # 178 from Weescottslass Creations you can download HERE.

Let´s begin:

1.- Open a new raster layer of 500 x 500 pixels.

2.- Copy and paste as new layer Paper 17, resize to 28%. Open your mask in your PSP, go to masks/new mask/from an image, and apply the mask to the paper layer. Then masks/delete mask and then resize this layer to 105%.

3.- Now copy and paste as new layer Splatter 02, resize to 18%, dupilcate once this layer, then reflet and turn down.

4.- Copy and paste as new layer Horloge 02, resize to 18%.

5.- Copy and paste as new layer Arangement 02, resize to 30%. See my image and put the layers as you can see their.

6.- Copy and paste as new layer Bille, resize to 25%.

7.- Copy and paste as new layer Feulliage03ombre. Resize to 20%. Put this layer as floor of your ©Gorjuss tube, now copy and paste the girl tube, and resize to convenience.

8.- Copy and paste as new layer arangement 01, resize to 25%.

9.- Open the Wordart from your scrap kit, now with your lace tool, select the heart, the go to copy, and paste in your tag as new layer, put the heart as you can see in my tag, and then duplicate once and reflet. Apply a light drop shadow with black colour to both heart layers.

10.- Copy and paste as new layer Feulliage 04, resize to 18%, and apply the same drop shadow as before. Move this layer below the hearts layers.

11.- Copy and paste as new layer both butterflies, resize to convenience. And put them as you can see in my tag.

12.- Copy and paste as new layer Ruban05, resize to 10%. Then move the layer below the heart layer.

13.- Now merge all visible layers, add your licence number and your name, with a font of your choice, I used: Mostilos, size: 48, with a black colour outside and a gold texture inside. Then apply drop shadow with the following settings: 1 - 1 - 54 - 4,9.

14.- Save as png.

It's done.

jueves, 24 de septiembre de 2009

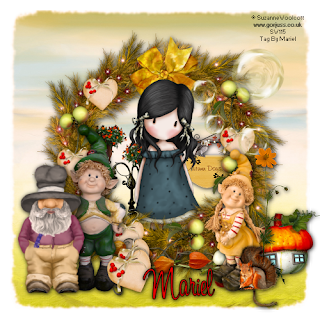
Tut "Autumn Days"


For this new tutorial you will need the following things:

First of all the beautiful scrap kit from Scrappingmar, called "Autumn Days", is a PTU and you can purchase the kit HERE.

The tube is one the of the wonderful ©Gorjuss girls, from Suzanne Woolcott, you can purchase her tubes HERE.

Let's begin:

1.- Open a new raster layer of 500 x 500 pixels.

2.- Copy and paste as new layer Paper 8, resize to 13%. The scrap kit is full size, so you have to resize more.

3.- Copy and paste as new layer Element 55, resize to 20%, apply some drop shadow of your choice.

4.- Now copy and paste as new layer Elements 20 and 51, resize to convenience, and move both behind the crow and with your eraser tool delete all what exceed the crown. Apply the same drop shadow as before.

5.- Now copy and paste as new layer the ©Gorjuss tube, resize to 75%, move this layer behind the crow, then duplicate the tube layer once, and move this layer up, now with your lace tool select all what exceed the crow and delete, so you can see the girl through the crown.

6.- Now copy and paste as new layers the elfs, the squirrel, the mushroom house, and the felp heart, resize all to convenience and apply drop shadow as before.

7.- Copy and paste as new layer the bubble, resize to convenience, and duplicate the layer three times. Now resize all to different sizes and put them as you can see in my tag.

8.- Copy and paste as new layers other elements as flowers or leaves, resize them and apply drop shadow.

9.- Merge all visible layers, and add your licence number, and your name with a font of your choice. Use a strong red inside your letters and use the same drop shadow as before.

10.- Save as png.

It's done.

I hope you like this tut.


I love to see all your results, if you want you can send me your tags with the results of my tuts to: newartisticdreams@gmail.com


Thank you for try this and the others tuts.


This tutorial was writting by me, Mariel - ©Artistic Dreams on 24th of september of 2009 any resemblance to any other tutorial is completely coincidental.


Mariel - ©Artistic Dreams

viernes, 18 de septiembre de 2009

Tut "Boo"


For this simple tutorial you will need the following things:

The beautiful tag from Designs by Ali, is freebie and you can download HERE.

The tubes from ©Suzanne Woolcott, you can purchase her art HERE.

Let's begin:

1.- Open a new raster layer of 500 x 500 pixels.

2.- Copy and paste as new layer the DBA_Quick Tag 1, resize to 65%.

3.- Copy and paste as new layers the ©Gorjuss tubes witch, cat and broom. Then apply some drop shadow.

4.- Merge all visible layers, add your licence number and write your name, I used font: Halloween_Miscreant, size 48, colour outside: black, colour inside: #516256. Apply the same drop shadow as you used before.

5.- Save as png.

It's done.

I hope you like this tut.


I love to see all your results, if you want you can send me your tags with the results of my tuts to: newartisticdreams@gmail.com


Thank you for try this and the others tuts.


This tutorial was writting by me, Mariel - ©Artistic Dreams on 19th of september of 2009 any resemblance to any other tutorial is completely coincidental.


Mariel - ©Artistic Dreams

Tut "Illusions"


For this tutorial you will need the following things:

First of all the beautiful scrap kit from Jaelop called: "Peace and Love", is a freebie and you can download the kit HERE.

The tube is HERE.
The mask # 9 is from Babe's Designz and is HERE.

Let's begin:

1.- Open a new raster layer of 500 x 500 pixels.

2.- Copy and paste as new layer Paper 2, then open your mask in your PSP, go to mask/new mask/ from an image, and apply the mask to the paper layer. Then go to masks/delete mask.

3.- Copy and paste as new layer Frame 9, resize to 25%, with your magic wand select into the frame, go to selection/modify/expand 10, copy and paste as new layer paper 4, resize to 25%, then go to selection/invert and then edit/cut. Move the paper layer below the frame layer.

4.- Copy and paste as new layer Element 41, resize to 25% and rotate free 90 degrees, move this layer below the frame layer. And then delete all what exceed the frame.

5.- Copy and paste as new layer the tube in supplies, resize to 85%, and duplicate the layer.

6.- Copy and paste as new layer Element 45, resize to 25%, rotate free 90 degrees. Put as you can see in my tag.

7.- Copy and paste as new layer Element 48, resize to 25% and apply drop shadow of choice.

8.- Copy and paste as new layer Element 44, resize to 25%, rotate free 90 degrees to the left. Apply drop shadow of choice.

9.- Copy and paste as new layer Element 21, resize to 25% and apply drop shadow. Now copy and paste as new layers Flowers 14, 33, 34 and 35, resize to convenience, see my tag and put them as you can see there. Apply the same drop shadow as before.

10.- Now put the copy layer of the tube Angel up all the other layers, and delete all what you need, you have to see my tag to do that, see the arm through the frame and the wings. So then delete all the rest of the image.
11.- Now add your copyright and write your name with a font of your choice. Apply some blinds effects and drop shadow as you used before.
12.- Then merge all visible layers, and save as png.

It's done.

I hope you like this tut.

I love to see all your results, if you want you can send me your tags with the results of my tuts to: newartisticdreams@gmail.com

Thank you for try this and the others tuts.

This tutorial was writting by me, Mariel - ©Artistic Dreams on 18th of september of 2009 any resemblance to any other tutorial is completely coincidental.

Mariel - ©Artistic Dreams

Tut "Chocolite"


For this tutorial you will need the following things:

First of all the beautiful scrap kit Freebie from Bastelagalaxy, called "Cream Chocolate", you can download this kit HERE.

The tube is from ©Susan McKivergan, you can purchase her tubes in AMI HERE.

Let's begin:

1.- Open a new raster layer of 500 x 500 pixels.

2.- Copy and paste as new layer Frame 2, with your magic wand select into the frame, and copy and paste as new layer Paper 17, now go to selection/modify/expand 3, then go to selection/invert and then Edit/Cut. Move the paper layer below the frame layer.

3.- Now copy and paste as new layer lace 2, move this layer as background and resize to 125%.

4.- Copy and paste as new layer flower 8, resize to 50%, do the same with Flower 7, reflet and reize to 50%, too. Put them to both size of the frame. See my tag for help.

5.- Copy and paste as new layer the ©Susan McKivergan tube, move the layer below the frame layer, then duplicate the tube and move the copy, up, then in this layer delete all what exceed the frame.

6.- Copy and paste as new layers Flower 3 and 4, duplicate both and resize to 25%, put all of them as you can see in my tag. Now copy and paste as new layer Flower 6, resize to 20% and put in the center, move the layer below the other flowers.

7.- Copy and paste as new layer Butterfly 3, resize to 50%, and do the same with Bow 1. Put as you can see in my tag.

8.- Apply drop shadow to all the elements, flowers, butterfly, bow and frame with this settings: 1- 1- 91 - 9,9, with black colour.

9.- Add your licence number and your name, I used font: Baskerville Old Face, size: 48, colour outside: black, colour inside: #873F19. Apply the same drop shadow as you used before.

10.- Save as png.

It's done.

I hope you like this tut.

I love to see all your results, if you want you can send me your tags with the results of my tuts to: newartisticdreams@gmail.com

Thank you for try this and the others tuts.

This tutorial was writting by me, Mariel - ©Artistic Dreams on 18th of september of 2009 any resemblance to any other tutorial is completely coincidental.

Mariel - ©Artistic Dreams

jueves, 17 de septiembre de 2009

Tut "Bootiful"


For this tutorial you will need the following things:

First of all my scrap kit freebie called "Bootiful", you can download the kit HERE.

The tube is from ©Débora García, and you can purchase this and other tubes HERE.

The template # 13 is from My Juicy Bits, and you can download HERE.

The mask # 39 is HERE.

Let's begin:

1.- Open your template in your PSP, then duplicate and close the original. delete the credits layer, then fill the diferent elements with papers of your choice from my scrap kit.

2.- Copy and paste as new layer a paper of your choice you didn't use before, open the mask in your PSP, go to masks/new mask/from an image, and apply the mask to the paper layer. Then go to masks/delete mask. and put this layer as background.

3.- Copy and paste as new layer the black bow, resize to 15%, then copy and paste as new layer all the other elements, the skull, the books, the cauldron, the bloody paper, apply drop shadow of choice and resize to convenience.

4.- Copy and paste as new layer The flowers at the size of your rectangle frame, I resized to 25%, duplicate once, and reflet the copy. Apply drop shadow as before.

5.- Copy and paste as new layer the ©Débora García tube, resize to convenience, and apply drop shadow as before.

6.- Copy and paste as new layer the wordart from my kit, resize to 40%.

7.- Merge all visible layers and add your copyright and licence number.

8.- Write your name with a font of your choice, with some colours who match with the tag, and apply drop shadow as before.

9.- Save as png.

It's done.

I hope you like this tut.


I love to see all your results, if you want you can send me your tags with the results of my tuts to: newartisticdreams@gmail.com


Thank you for try this and the others tuts.


This tutorial was writting by me, Mariel - ©Artistic Dreams on 18th of september of 2009 any resemblance to any other tutorial is completely coincidental.


Mariel - ©Artistic Dreams

Tut "Dusky Bliss"


For this tutorial you will need the following things:
First of all the beautiful scrap kit from Treasures by Terry, called "Dusky Bliss" you can purchase this kit HERE.
The tube is from ©Suzanne Woolcott, and you can purchase her tubes HERE.
The mask is HERE.
Let's begin:
1.- Open a new raster layer of 500 x 500 pixels.
2.- Copy and paste as new layer "Paper 15", open your mask in your PSP, and go to masks/new mask/from an image. And apply the mask to the paper layer. Go to mask/invert, and the delete mask.
3.- Copy and paste as new layer "triplewrappedframe", resize to 85%. Select with your magic wand into the first and the third squares in your frame. Copy and paste as new layer Paper 18. Go to selection/modify 3. Then invert selection and Edit/Cut. Move this layer below the frame layer.
4.- Copy and paste as new layer Paper 17, then go to selection/modify 3/ and then go to selection/invert, and edit/Cut.
5.- Copy and paste as new layer "doddle TbT", resize to convenience, then move this layer below the background frame layer, rotate 90 degrees, and duplicate this layer, then turn up one of them. Put this layers as you can see in my tag.
6.- Copy and paste as new layer "bowandflowers TbT", resize to 25%, and then put as you can see in my tag.
7.- Copy and paste as new layer "flowercluster", resize to 25%. Apply drop shadow of choice.
8.- Copy and paste as new layer the ©Gorjuss tube, resize if it's necessary. Delete all what exceed the frame.
9.- Copy and paste as new layer "butterflycharm1", resize to 40%. Apply drop shadow.
10.- Add your licence number and your name, with a font of your choice, I used: Bambino, size: 48, colour outside: #47131F, colour outside: #C398A1. Apply drop shadow as before.
11.- Save as png.
It's done.
I hope you like this tut.

I love to see all your results, if you want you can send me your tags with the results of my tuts to: newartisticdreams@gmail.com

Thank you for try this and the others tuts.

This tutorial was writting by me, Mariel - ©Artistic Dreams on 17th of september of 2009 any resemblance to any other tutorial is completely coincidental.

Mariel - ©Artistic Dreams

Tut "I'm not a Princess"


For this tutorial you will need the following things:
First the beautiful scrap kit from Crimson Butterfly Scrapz, called "I'm not a Princess", is a PTU and you can purchase this kit HERE.
The tube is from ©Suzanne Woolcott, and you can purchase her art HERE.
Let's begin:
1.- Open a new raster layer of 500 x 500 pixels.
2.- Copy and paste as new layer Frame 3, resize to 68%. With your magic wand select into one of the squares, go to selection, modify, expand 3, now copy and paste as new layer a paper of your choice, then go to selection and invert, then go to Edit/Cut. Repeat the same with other paper of your choice into the other square.
3.- Copy and paste as new layer Rose 2, resize to 40%, and reflet, the put into the first square in the frame as you can see in my tag.
4.- Copy and paste as new layer Softrain, resize to 40% and put into the other square in the frame.
5.- Copy and paste as new layer Floerbranch, resize to 15%, put into the frame as you can see in my tag, then duplicate and reflet once, and put the copy as you can see in my tag too.
6.- Copy and paste as new layer Ropedheart 2, resize to 15%, put in the frame. See my image for help.
7.- Copy and paste as new layer Doodle 3, resize to 40%, reflet and apply drop shadow with withe colour of your choice. Apply the same drop shadow to the frame layer.
8.- Copy and paste the ©Gorjuss girl, resize if you need, and delete all what exceed the frame. Apply drop shadow as before.
9.- Copy and paste as new layer the ©Gorjuss cat tube, resize if you need, see my image for help.
10.- Copy and paste as new layer Butterfly 2, resize to 70% or less and put this layer as background.
11.- Add your licence number and the copyright, and merge all visible layers.
12.- Write your name with a font of your choice, I used: Aquarelle, size:48, colour outside: black, colour inside: #7D1D79. Apply drop shadow as before.
13.- Save as png.
It's done.
I hope you like this tut.

I love to see all your results, if you want you can send me your tags with the results of my tuts to: newartisticdreams@gmail.com

Thank you for try this and the others tuts.

This tutorial was writting by me, Mariel - ©Artistic Dreams on 17th of september of 2009 any resemblance to any other tutorial is completely coincidental.

Mariel - ©Artistic Dreams

lunes, 7 de septiembre de 2009

Tutorial "Pequeños Placeres"


Si te gusta este tag, lo puedes hacer siguiendo un hermoso y simple tutorial escrito por mi amiga Maryana en nuestro blog de tutoriales en español AQUI.
Espero que lo disfrutes tanto como yo lo hice.
Cariños.
Mariel - ©Artistic Dreams

domingo, 6 de septiembre de 2009

Tut "Happy Day"


For this tut you will need the following things:

First of all the beautiful scrap kit from Caravan Scraps, called "Afternoon Delight", is a PTU and you can purchase this kit HERE.

The tube is from ©Suzanne Woolcott and you can purchase her tubes HERE.

Let's begin:

1.- Open a new raster layer of 500 x 500 pixels.

2.- Copy and paste as new layer Paper 4, with your rectangle selection tool, select a rectangle as you can see in my tag, and then go to selection/invert and then Edit/Cut. Apply some drop shadow of your choice.

3.- Copy and paste as new layer Element Tree, resize to 60%, then apply drop shadow of choice, and duplicate the layer, then reflet the copy.

4.- Copy and paste as new layer Element Tree 2, resize to 75%, then apply drop shadow as you used before.

5.- Copy and paste as new layer Element Fence, resize to 25%, apply drop shadow. Then duplicate and reflet the copy layer.

6.- Copy and paste as new layer Element Kitty, resize to 25%, apply drop shadow.

7.- Copy and paste as new layer Element Puppy, resize to 20%, apply drop shadow.

8.- Copy and paste as new layer Element Birdie 3, resize to 20%, apply drop shadow as before.

9.- Copy and paste the ©Gorjuss tube, resize to convenience, and apply drop shadow as before.

10.- Merge all visible layers, add your licence number and your name with a font of your choice, I used: A&S Black Swan.

11.- Save as png.

It's done.

I hope you like this tut.


I love to see all your results, if you want you can send me your tags with the results of my tuts to: newartisticdreams@gmail.com


Thank you for try this and the others tuts.


This tutorial was writting by me, Mariel - ©Artistic Dreams on 6th of september of 2009 any resemblance to any other tutorial is completely coincidental.


Mariel - ©Artistic Dreams

Tut "Halloween Ghosties"


For this easy tut you will need the following things:
First of all the beautiful pack of Gorjuss Ghosties, you can purchase ©Suzanne Woolcott tubes HERE.
My supplies you can download HERE.
Let's begin:
1.- Open a new raster layer of 500 x 500 pixels.
2.- Now copy and paste as new layer background mask word art.
3.- Then copy and paste as new layer the frame, the doddle and the candies.
4.- Copy and paste as new layer the Gorjuss tubes, and resize if you need. Apply some shadow of choice, and merge all the visible layers.
5.- Add your licence number and write your name with a font of your choice, better if it's a Halloween font. Apply some drop shadow as you used before.
6.- Save as png.
Hope you like this tut.
I hope you like this tut.

I love to see all your results, if you want you can send me your tags with the results of my tuts to: newartisticdreams@gmail.com

Thank you for try this and the others tuts.

This tutorial was writting by me, Mariel - ©Artistic Dreams on 6th of september of 2009 any resemblance to any other tutorial is completely coincidental.

Mariel - ©Artistic Dreams

Tut "Sweetie"


For this tut you will need the following things:
First of all the beautiful scrap kit from Scrappingmar called "Sunrise", is a PTU and you can purchase her scrap kit HERE.
The tube is one of the beauties from ©Suzanne Woolcott, and you can purchase her art HERE.
The mask is the number 24 from Babe Designz, and you can download HERE.
Let´s begin:
1. Open a new raster layer of 500 x 500 pixels.
2.- Copy and paste as new layer Paper 7, now open the mask in your PSP, go to masks/new mask/from an image, and apply the mask to the paper layer, then go to mask/invert and then delete mask.
3.- Now copy and paste as new layer Element 36, resize to 15%.
4.- Copy and paste as new layer Element 58, resize to 40%. With your magic wand select into the frame, go to selection/modify/expand 3.
5.- Copy and paste as new layer the ©Gorjuss image of your choice. resize if you need. Move the layer below the frame and go to selection/invert and the Edit / Cut. Add some drop shadow to the frame.
6.- Copy and paste as new layer Element 46, resize to 8% and then rotate free 15 degrees to the left, Apply some dorp shadow of your choice, and the duplicate the layer and reflet the copy. Put them as you can see in my tag.
7.- Copy and paste as new layer Element 65, resize to 8%.
8.- Copy and paste as new layer Element 64, resize to 10%, rotate free 15 degrees to the left. Apply drop shadow of choice.
9.- Copy and paste as new layer Element 69, resize to 10%.
10.- Copy and paste as new layer Element 48, resize to 10%, move this layer below the layer you used in step 9 and apply drop shadow of your choice.
11.- Copy and paste as new layers Elements 31 and 32, resize to 5% and reflet one fo them. See my image for help.
12.- Merge all visible layers and add your licence number.
13.- Write your name I used font: Portfolio, size: 36, colour of choice and apply drop shadow as you used before.
14.- Save as png.
It's done.
I hope you like this tut.

I love to see all your results, if you want you can send me your tags with the results of my tuts to: newartisticdreams@gmail.com

Thank you for try this and the others tuts.

This tutorial was writting by me, Mariel - ©Artistic Dreams on 6th of september of 2009 any resemblance to any other tutorial is completely coincidental.

Mariel - ©Artistic Dreams

jueves, 3 de septiembre de 2009

Tut "Cat and Bird"


For this tutorial you will need the following things:

First of all the beautiful scrap kit from Jaelop called "Black Night", is a Freebie and you can download the kit HERE.

The tube is a beautiful cat from ©Suzanne Woolcott, and you can get a licence number and purchase her tubes HERE.

The mask is the number 32 from Babe Designz, and you can download HERE.

Let's begin:

1.- Open a new raster layer of 500 x 500 pixels.

2.- Copy and paste as new layer Paper 1, then open your mask in your PSP, go to masks/new mask/ from an image, and apply the mask to the paper layer. Then go to masks/delete mask.

3.- Now copy and paste as new layer Element 17, resize to 25%.

4.- Copy and paste as new layer Element 3, resize to 18%, and apply some drop shadow of choice.

5.- Copy and paste as new layer the Gorjuss tube, and resize to convenience. Move this layer below the frame layer.

6.- Copy and paste as new layer Element 10, resize to 14%, and reflet.

7.- Copy and paste as new layer Element 23, resize to 15%, and apply the same drop shadow as you used before.

8.- Copy and paste as new layer Element 15, resize to 15%, reflet and then rotate free 15 degrees to the right. Now duplicate the layer, reflet theis copy and turn down. Move both layers below the feathers layer.

9.- Copy and paste as new Element 14, resize to 15%, with your eraser tool delete the stem, and then duplicate the layer, and turn down the copy layer. Put them as you can see in my tag.

10.- Copy and paste as new layer Elements 19a and 21, and resize to 15% and 12%, respectively. Put them as you can see in my tag.

11.- Copy and paste as new layer Element 6a, resize to 7%, duplicate twice, and apply drop shadow as you used before. Put the three flowers as you can see in my tag.

12.- Copy and paste as new layer Element 1, resize to 20% or something less, and apply drop shadow too, the rotate free 10 degrees to the left.

13.- Add your licence number and merge all visible layers.

14.- Write your name with a font of your choice, I used: font: Mostilos, size: 36, colour outside: black, colour inside: #FBFDD1. Apply drop shadow as you used before.

15.- Save as png.

It's done.

I hope you like this tut.


I love to see all your results, if you want you can send me your tags with the results of my tuts to: newartisticdreams@gmail.com


Thank you for try this and the others tuts.


This tutorial was writting by me, Mariel - ©Artistic Dreams on 3rd of september of 2009 any resemblance to any other tutorial is completely coincidental.


Mariel - ©Artistic Dreams

Tutorial "Romántica"


Si te gusta este tag, lo puedes hacer siguiendo un hermoso y simple tutorial escrito por mi amiga Maryana en nuestro blog de tutoriales en español AQUI.

Espero que lo disfrutes.

Cariños.

Mariel - ©Artistic Dreams

miércoles, 2 de septiembre de 2009

Woww!!! I'm Happy!!!! I have a new blog for tutos in spanish!!

Hi all, I start to write my tuts in spanish too, and with my friend Maryana released a new blog where you can find all my new tutorials in spanish.
She helps to me with traduction and together we can do this new proyect a reality.
Thank you for all the people who leave messages asking for spanish tutorials, now you can find them in this blog, hope you like our work there, and enjoy as much as possible with the new tuts.
Big hugs and thank you Maryana for your friendship and help.
Kisses.
Mariel - ©Artistic Dreams.