sábado, 17 de abril de 2010
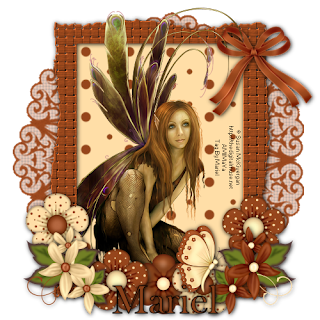
Tut "A bit of magic"

miércoles, 6 de enero de 2010
Tutorial "Still Looking" by Stef

domingo, 4 de octubre de 2009
Tut "Think Pink"

For this tutorial you will need the following things:
First of all the beautiful scrap kit from "La Carolita Designs" called "Thinking Pink", is a freebie and you can download the kit HERE.
The tube is a girl from ©Suzanne Woolcott and you can purchase her art HERE.
The Template # 35 is from Babe's Designz and you can download HERE.
Let's begin:
1.- Open your template in your PSP, duplicate and save the original.
2.- Now select the backgrownd layer and delete, do the same with the credits layer.
3.- Now with your magic wand select the middle circle, then copy and paste as new layer Paper 3, go to selection/invert and then Edit/Cut.
4.- Now select the doodle and the stitch, and apply drop shadow 1 - 1 - 90 - 9,9, with black colour.
5.- Now colorice the last layer Dye: 240, Saturation: 144.
6.- Copy and paste as new layer bow 4, resize to 20% and apply the same drop shadow as before.
7.- Copy and paste as new layer the Gorjuss tube, resize to convenience and apply drop shadow as before.
8.- Copy and paste as new layer ivy, resize to 20%, duplicate once and then reflet one of them, apply drop shadow as before.
9.- Copy and paste as new layer buttonbelieve, resize to convenience, and apply the same drop shadow.
10.- Copy and paste as new layer Flower 2, resize to 40% or less, apply drop shadow as before, duplicate once and reflet.
11.- Merge all visible layers, resize your tag to 75% and add your licence number and your name, I use font: Brush Script MT, size: 48, colour outside: black, colour inside: #A02C56, apply the same drop shadow as before but now with white colour.
12.- Save as png.
It's done.
I hope you like this tut.
I love to see all your results, if you want you can send me your tags with the results of my tuts to: newartisticdreams@gmail.com
Thank you for try this and the others tuts.
This tutorial was writting by me, Mariel - ©Artistic Dreams on 4th of october of 2009 any resemblance to any other tutorial is completely coincidental.
Mariel - ©Artistic Dreams
miércoles, 30 de septiembre de 2009
Tut "Lady Bug"

For this tutorial you will need the following things:
First of all the beautiful scrap kit Freebie from Designs by Ali, called "Caring Carrie", you can download the kit HERE.
The wonderful tube is a girl from ©Suzanne Woolcott, and you can purchase her tubes and licence HERE.
The mask # 18 from Babe's Designz is HERE.
Let's begin:
1.- Open a new raster layer of 500 x 500 pixels.
2.- Copy and paste as new layer Paper 3, now go to masks/new mask/from an image, and apply the mask to the paper layer. Then go to masks/delete mask and then resize this layer to 110%.
3.- Copy and paste as new layer Journaling 2, and resize to 50%, then rotate free 15 degrees to the left. Apply drop shadow of choice.
4.- Copy and paste as new layer Journaling 1, resize to 50%, and put as you can see in my tag, now apply the same drop shadow as before.
5.- Copy and paste as new layer Frame 3, resize to 50%, with your magic wand select into the frame, go to selection/modify/expand 4. Then copy and paste as new layer Paper 9, go to selection/invert and then Edit/cut, move the paper layer below the frame layer. Apply drop shadow to the frame.
6.- Copy and paste as new layer the ©Gorjuss girl, resize to 75%, and duplicate the layer. Reserve this layer until the end.
7.- Copy and paste as new layer Flower pot 2, resize to 50%, apply drop shadow as before. Now copy and paste as new layers all the flowers of your choice, I used daisies 1 and 2, duplicate and resize to convenience, do the same with the crochet bow 1, resize to convenience, apply drop shadow as you used before.
8.- Copy and paste as new layer some other flowers, and the Lady Bug, resize to 25%, and rotate free 25 degrees to the right. Now duplicate once, and reflet, resize this one to 85% and put both as you can see in my tag.
9.- Now move the copy layer of your ©Gorjuss girl forward all the other layers, with your lace tool select all what you want to delete in this tube, and then go to edit/cut. You can see the girl below and through the frame.
10.- Now merge all visible layers, and add your licence number and your name, I used Font: Katarina, size: 48, colour outside: #443D2F, colour inside: #B5A7A1. Apply inner bevel of choice, and the same drop shadow as you used before.
11.- Save as png.
It's done.
I hope you like this tut.
I love to see all your results, if you want you can send me your tags with the results of my tuts to: newartisticdreams@gmail.com
Thank you for try this and the others tuts.
This tutorial was writting by me, Mariel - ©Artistic Dreams on 30th of september of 2009 any resemblance to any other tutorial is completely coincidental
Mariel - ©Artistic Dreams
sábado, 26 de septiembre de 2009
Tut "Gold Tag"
For the following tutorial you will need:
The beautiful scrap kit Freebie from Shineangel Création, called "Splash of Gold", you can download HERE.
The beautiful ©Gorjuss tube from Suzanne Woolcott, you can purchase her art HERE.
The mask # 178 from Weescottslass Creations you can download HERE.
Let´s begin:
1.- Open a new raster layer of 500 x 500 pixels.
2.- Copy and paste as new layer Paper 17, resize to 28%. Open your mask in your PSP, go to masks/new mask/from an image, and apply the mask to the paper layer. Then masks/delete mask and then resize this layer to 105%.
3.- Now copy and paste as new layer Splatter 02, resize to 18%, dupilcate once this layer, then reflet and turn down.
4.- Copy and paste as new layer Horloge 02, resize to 18%.
5.- Copy and paste as new layer Arangement 02, resize to 30%. See my image and put the layers as you can see their.
6.- Copy and paste as new layer Bille, resize to 25%.
7.- Copy and paste as new layer Feulliage03ombre. Resize to 20%. Put this layer as floor of your ©Gorjuss tube, now copy and paste the girl tube, and resize to convenience.
8.- Copy and paste as new layer arangement 01, resize to 25%.
9.- Open the Wordart from your scrap kit, now with your lace tool, select the heart, the go to copy, and paste in your tag as new layer, put the heart as you can see in my tag, and then duplicate once and reflet. Apply a light drop shadow with black colour to both heart layers.
10.- Copy and paste as new layer Feulliage 04, resize to 18%, and apply the same drop shadow as before. Move this layer below the hearts layers.
11.- Copy and paste as new layer both butterflies, resize to convenience. And put them as you can see in my tag.
12.- Copy and paste as new layer Ruban05, resize to 10%. Then move the layer below the heart layer.
13.- Now merge all visible layers, add your licence number and your name, with a font of your choice, I used: Mostilos, size: 48, with a black colour outside and a gold texture inside. Then apply drop shadow with the following settings: 1 - 1 - 54 - 4,9.
14.- Save as png.
It's done.
viernes, 18 de septiembre de 2009
Tut "Boo"

For this simple tutorial you will need the following things:
The beautiful tag from Designs by Ali, is freebie and you can download HERE.
The tubes from ©Suzanne Woolcott, you can purchase her art HERE.
Let's begin:
1.- Open a new raster layer of 500 x 500 pixels.
2.- Copy and paste as new layer the DBA_Quick Tag 1, resize to 65%.
3.- Copy and paste as new layers the ©Gorjuss tubes witch, cat and broom. Then apply some drop shadow.
4.- Merge all visible layers, add your licence number and write your name, I used font: Halloween_Miscreant, size 48, colour outside: black, colour inside: #516256. Apply the same drop shadow as you used before.
5.- Save as png.
It's done.
I hope you like this tut.
I love to see all your results, if you want you can send me your tags with the results of my tuts to: newartisticdreams@gmail.com
Thank you for try this and the others tuts.
This tutorial was writting by me, Mariel - ©Artistic Dreams on 19th of september of 2009 any resemblance to any other tutorial is completely coincidental.
Mariel - ©Artistic Dreams
Tut "Illusions"

I love to see all your results, if you want you can send me your tags with the results of my tuts to: newartisticdreams@gmail.com
Thank you for try this and the others tuts.
This tutorial was writting by me, Mariel - ©Artistic Dreams on 18th of september of 2009 any resemblance to any other tutorial is completely coincidental.
Mariel - ©Artistic Dreams
Tut "Chocolite"
I love to see all your results, if you want you can send me your tags with the results of my tuts to: newartisticdreams@gmail.com
Thank you for try this and the others tuts.
This tutorial was writting by me, Mariel - ©Artistic Dreams on 18th of september of 2009 any resemblance to any other tutorial is completely coincidental.
Mariel - ©Artistic Dreams
jueves, 17 de septiembre de 2009
Tut "Bootiful"

For this tutorial you will need the following things:
First of all my scrap kit freebie called "Bootiful", you can download the kit HERE.
The tube is from ©Débora García, and you can purchase this and other tubes HERE.
The template # 13 is from My Juicy Bits, and you can download HERE.
The mask # 39 is HERE.
Let's begin:
1.- Open your template in your PSP, then duplicate and close the original. delete the credits layer, then fill the diferent elements with papers of your choice from my scrap kit.
2.- Copy and paste as new layer a paper of your choice you didn't use before, open the mask in your PSP, go to masks/new mask/from an image, and apply the mask to the paper layer. Then go to masks/delete mask. and put this layer as background.
3.- Copy and paste as new layer the black bow, resize to 15%, then copy and paste as new layer all the other elements, the skull, the books, the cauldron, the bloody paper, apply drop shadow of choice and resize to convenience.
4.- Copy and paste as new layer The flowers at the size of your rectangle frame, I resized to 25%, duplicate once, and reflet the copy. Apply drop shadow as before.
5.- Copy and paste as new layer the ©Débora García tube, resize to convenience, and apply drop shadow as before.
6.- Copy and paste as new layer the wordart from my kit, resize to 40%.
7.- Merge all visible layers and add your copyright and licence number.
8.- Write your name with a font of your choice, with some colours who match with the tag, and apply drop shadow as before.
9.- Save as png.
It's done.
I hope you like this tut.
I love to see all your results, if you want you can send me your tags with the results of my tuts to: newartisticdreams@gmail.com
Thank you for try this and the others tuts.
This tutorial was writting by me, Mariel - ©Artistic Dreams on 18th of september of 2009 any resemblance to any other tutorial is completely coincidental.
Mariel - ©Artistic Dreams
domingo, 6 de septiembre de 2009
Tut "Halloween Ghosties"

I love to see all your results, if you want you can send me your tags with the results of my tuts to: newartisticdreams@gmail.com
Thank you for try this and the others tuts.
This tutorial was writting by me, Mariel - ©Artistic Dreams on 6th of september of 2009 any resemblance to any other tutorial is completely coincidental.
Mariel - ©Artistic Dreams
jueves, 3 de septiembre de 2009
Tut "Cat and Bird"

For this tutorial you will need the following things:
First of all the beautiful scrap kit from Jaelop called "Black Night", is a Freebie and you can download the kit HERE.
The tube is a beautiful cat from ©Suzanne Woolcott, and you can get a licence number and purchase her tubes HERE.
The mask is the number 32 from Babe Designz, and you can download HERE.
Let's begin:
1.- Open a new raster layer of 500 x 500 pixels.
2.- Copy and paste as new layer Paper 1, then open your mask in your PSP, go to masks/new mask/ from an image, and apply the mask to the paper layer. Then go to masks/delete mask.
3.- Now copy and paste as new layer Element 17, resize to 25%.
4.- Copy and paste as new layer Element 3, resize to 18%, and apply some drop shadow of choice.
5.- Copy and paste as new layer the Gorjuss tube, and resize to convenience. Move this layer below the frame layer.
6.- Copy and paste as new layer Element 10, resize to 14%, and reflet.
7.- Copy and paste as new layer Element 23, resize to 15%, and apply the same drop shadow as you used before.
8.- Copy and paste as new layer Element 15, resize to 15%, reflet and then rotate free 15 degrees to the right. Now duplicate the layer, reflet theis copy and turn down. Move both layers below the feathers layer.
9.- Copy and paste as new Element 14, resize to 15%, with your eraser tool delete the stem, and then duplicate the layer, and turn down the copy layer. Put them as you can see in my tag.
10.- Copy and paste as new layer Elements 19a and 21, and resize to 15% and 12%, respectively. Put them as you can see in my tag.
11.- Copy and paste as new layer Element 6a, resize to 7%, duplicate twice, and apply drop shadow as you used before. Put the three flowers as you can see in my tag.
12.- Copy and paste as new layer Element 1, resize to 20% or something less, and apply drop shadow too, the rotate free 10 degrees to the left.
13.- Add your licence number and merge all visible layers.
14.- Write your name with a font of your choice, I used: font: Mostilos, size: 36, colour outside: black, colour inside: #FBFDD1. Apply drop shadow as you used before.
15.- Save as png.
It's done.
I hope you like this tut.
I love to see all your results, if you want you can send me your tags with the results of my tuts to: newartisticdreams@gmail.com
Thank you for try this and the others tuts.
This tutorial was writting by me, Mariel - ©Artistic Dreams on 3rd of september of 2009 any resemblance to any other tutorial is completely coincidental.
Mariel - ©Artistic Dreams
miércoles, 2 de septiembre de 2009
Tutorial "Love"

I love to see all your results, if you want you can send me your tags with the results of my tuts to: newartisticdreams@gmail.com
Thank you for try this and the others tuts.
This tutorial was writting by me, Mariel - ©Artistic Dreams on 2nd of september of 2009 any resemblance to any other tutorial is completely coincidental.
Mariel - ©Artistic Dreams
jueves, 27 de agosto de 2009
Tut "My Secret Place"

I love to see all your results, if you want you can send me your tags with the results of my tuts to: newartisticdreams@gmail.com
Thank you for try this and the others tuts.
This tutorial was writting by me, Mariel - ©Artistic Dreams on 28th of august of 2009 any resemblance to any other tutorial is completely coincidental.
Mariel - ©Artistic Dreams
sábado, 8 de agosto de 2009
Tut "Grunge Angel"

For this tut you will need the following things:
First of all the scrap kit from me called "Gothic Angel" FTU, you can download HERE.
The beautiful tube is a ©Suzanne Woolcott angel, and you can purchase her tubes and art HERE.
The mask # 167 is from Weestcotslass Creations and you can download HERE.
Let's begin:
1.- Open a new raster layer of 600 x 600 pixels.
2.- Copy and paste as new layer Paper 3 red, then open your mask in your PSP, go to masks/new mask /from an image, and apply the mask to the paper layer in your tag, then go to masks/delete and then resize this layer to 100%.
3.- Copy and paste as new layer Stamp doodle red, resize to 60%, and apply drop shadow of choice.
4.- Copy and paste as new layer Blood red, resize to 40% and put this layer as you can see in my tag.
5.- Copy and paste as new layer gancho 1, resize to 30%, apply drop shadow and duplicate three times, then put this image layers as you can see in my tag, two in one side of your tag, and two in the other side up.
6.- Copy and paste as new layers flower black and flower red and resize them to 40%, put as you can see in my tag.
7.- Copy and paste as new layer Heart black, and resize to 40%, and then rotate free 25 degrees to the left. Put this layer between the flowers layers.
8.- Copy and paste as new layer Pluma, resize to 7%, then rotate free 90 degrees to the right, and put this layer as you can see in my tag.
9.- Copy and paste as new layer the ©Gorjuss tube, and resize if it's necessary. Copy and paste stitch red, and resize to 40%, apply drop shadow to all the elements and then merge all visible layers. Now you can resize all the tag if it's biggest for you.
10.- Add your licence number, and your name, I used font: DumbAss size: 36, colour outside black, and colour inside:#800000. Then apply some inner bevel and drop shadow as you used before.
11.- Save as png.
It's done.
I hope you like this tut.
I love to see all your results, if you want you can send me your tags with the results of my tuts to: newartisticdreams@gmail.com
Thank you for try this and the others tuts.
This tutorial was writting by me, Mariel - ©Artistic Dreams on 9th of august of 2009 any resemblance to any other tutorial is completely coincidental.
Mariel - ©Artistic Dreams
Tut "Magic World"

For this simple tut you will need the following things:
The tube of your choice, I used both in different tags, one from the beautiful new pack # 38 from Suzanne Woolcott, you can buy her tubes HERE, and the other from ©Débora García, you can buy this pack HERE. Both are PTU and you need a licence number.
The frame and the Kristie picture you can find in my supplies HERE and HERE.
Let´s begin:
1.- Open the supplies in your PSP, with your magic wand select into the frame, and go to selections/modify/expand 5. Then copy and paste as new layer Image 1, resize to convenience, then go to selection/invert and then Edit/Cut. Move this layer below the frame layer.
2.- Copy and paste the tube of your choice, resize to convenience and apply drop shadow of choice.
3.- Merge all the vosible layers, and add your licence number.
4.- Write your name and the words "Magic World" with the same font, I used: Dr Carbfred, size: 36 colour outside: none, colour inside: black. Apply drop shadow with the following settings: 1 - 1 - 90 - 9.9, with black colour, twice, and then with white colour once.
5.- Save as png.
It's done.
I hope you like this tut.
I love to see all your results, if you want you can send me your tags with the results of my tuts to: newartisticdreams@gmail.com
Thank you for try this and the others tuts.
This tutorial was writting by me, Mariel - ©Artistic Dreams on 8th of august of 2009, any resemblance to any other tutorial is completely coincidental.
Mariel - ©Artistic Dreams
martes, 30 de junio de 2009
Tut "A Hint of Colour"

This tutorial is dedicate to my friend Lorna, who is a beautiful friend of mine, and I love her so much. Look at her work in her blog, and leave her some luv xxx, HERE.
For this tut you will need the following things:
First of all the beautiful scrap kit from Wicked Princess Scraps, called "Wickedly Dark", is a FREEBIE, and you can download in her blog HERE.
I love to see all your results, if you want you can send me your tags with the results of my tuts to: newartisticdreams@gmail.com
Thank you for try this and the others tuts.
This tutorial was writting by me, Mariel - ©Artistic Dreams on 30th of june of 2009, any resemblance to any other tutorial is completely coincidental.
Mariel - ©Artistic Dreams
lunes, 29 de junio de 2009
Tut "Twilight love forever"
miércoles, 24 de junio de 2009
Tut "4th of July"

Tut "Bloom"

First the beautiful Garden Grab Bag CU, from Scrappingmar, is a Freebie and you can download HERE and the Frames CU Freebies, HERE
The tube is a wonderful Canelita, from ©Canela Diseños, you can purchase her tubes HERE.
The mask is the first from this page HERE.
Let´s begin:
1.- Open a new raster layer of 500 x 500 pixels.
2.- Fill the background layer with this colour #678085, then open your mask in your PSP, and go to masks/new mask/from an image, apply the mask to the background layer, and then go to masks/delete mask.
3.- Copy and paste as new layer Frame 2S_Mar, resize to 50%. With your magic wand select into the frame, go to selection/modify/expand 5. Copy and paste as new layer a paper of your choice, then go to selection/invert, and then Edit/Cut. Now move this layer below the frame layer.
4.- Copy and paste as new layer the cloud, resize to 25%, go to layers and duplicate once, put this layer as you can see in my tag, now copy and paste as new layer the sun, and resize again to 25%.
5.- Copy and paste as new layer the tree, resize to 50%. Put this layer below the frame. Now copy and paste as new layer the bird, resize to convenience, and apply drop shadow of choice.
6.- Now copy and paste as new layers, the mushroom, the grass and the flowers, resize as you can see in my tag, and apply drop shadow as you used before.
7.- Copy and paste as new layers the ©Canela tubes, and resize to convenience.
8.- Merge all visible layers, and add the copyright.
9.- Write the words with a font of your choice, and then with a different font write your name. Colour outside: None, Colour inside: Black.
10.- Save as png.
It's done.
I hope you like this tut.
I love to see all your results, if you want you can send me your tags with the results of my tuts to: newartisticdreams@gmail.com
Thank you for try this and the others tuts.
This tutorial was writting by me, Mariel - ©Artistic Dreams on 24th of june of 2009, any resemblance to any other tutorial is completely coincidental.
Mariel - ©Artistic Dreams
lunes, 22 de junio de 2009
Tut "Twilight Love"
For this tut you will need the following things:
First of all my scrap kit freebie called "Twilight", you can download this kit HERE.
The JM Creations tube from the ©Twilight film, you can download HERE.
Let's begin:
1.- Open a new raster layer of 600 x 600 pixels.
2.- Copy and paste as new layer "table", go to layers, duplicate this layer once, and move the second up the other as background for your tag, as you can see in my tag.
3.- Copy and paste as new layer "paper and glitter black".
4.- Copy and paste as new layer "Glitter red", resize to 20%, move below, and then go to layers, dupllicate the layer once, then turn up, and reflet, put this layer as you can see in my tag.
5.- Copy and paste as new layer "twilight 1" wordart. Apply drop shadow with the following settings: 1 - 1 - 90-9,9, with white colour.
6.- Copy and paste as new layer "Frame 3", resize to 75%, with your magic wand select into the first frame, then copy and paste as new layer "PP 11", resize to 30%, go to selection/modify/expand 6, then again selection/invert and then edit/cut. Move this layer below the frame layer and duplicate the paper layer, put this layer below the last frame.
7.- With your magic wand select into the second frame, and copy and paste as new layer "PP12", resize to 30%, go to selection/modify/expand 6, and then selection/invert, now go to edit/cut. Put the paper layer below the frame layer, as you did with the other paper layers.
8.- Copy and paste as new layer "feather black", resize to 30%, go to layers and duplicate once, then reflet the last one and put both layers below the frame backgorund layers, as you can see in my tag.
9.- Copy and paste as new layer "Bow black 1", resize to 40%, go to layers and duplicate once. then reflet the last one. Now put them in the frame, see my tag for help.
10.- Copy and paste as new layer the ©Twilight tube, resize to 80%.
11.- Copy and paste as new layer "Heart and wings 2".
12.- Copy and paste as new layer "chezz white", resize to 50%, the copy and paste as new layer "chezz black", resize to 50%, and rotate free 90 degrees.
13.- Copy and paste as new layer "apple", resize to 50%.
14.- Copy and paste as new layer "butterflies", resize to 50% and apply drop shadow as you used in step # 5.
15.- Merge all visible layers, add your copyright.
16.- Write your name, I used font: "Twilight", size: 48, with black colour first, and again with red colour. Apply drop shadow of choice.
17.- Save as png.
It's done.
I hope you like this tut.
I love to see all your results, if you want you can send me your tags with the results of my tuts to: newartisticdreams@gmail.com
Thank you for try this and the others tuts.
This tutorial was writting by me, Mariel - ©Artistic Dreams on 22nd of june of 2009, any resemblance to any other tutorial is completely coincidental.
Mariel - ©Artistic Dreams