martes, 25 de octubre de 2011
After a year!!
lunes, 25 de octubre de 2010
ACD Forum
sábado, 23 de octubre de 2010
Updates in My Crazy Siggie Club!!!
Siggie Pack #001 at only USD 3 the pack contains 4 Halloween sigtags with animation.
sábado, 16 de octubre de 2010
Let me introduce My New Pixel Siggie Club!!!
martes, 5 de octubre de 2010
Quick Tag Nº 5
sábado, 25 de septiembre de 2010
Quick Tag Nº 4
After a long time, I'm back...
viernes, 23 de abril de 2010
Tut: "Vampires Diaries"

Quick Tag Nº 3
sábado, 17 de abril de 2010
Tut "A bit of magic"

jueves, 15 de abril de 2010
Quick Tag Nº 2
If you use my QUICK TAG in a tutorial, please link to my blog for download.
Download with a clic on the previous.
Quick Tag Nº 1

jueves, 1 de abril de 2010
I'm back after a long time...
domingo, 7 de febrero de 2010
Tut "Lavender Dreams"

It's done.
I hope you like this tut.
miércoles, 6 de enero de 2010
Tutorial "Still Looking" by Stef

lunes, 5 de octubre de 2009
Tut "Castle of Ice"

I love to see all your results, if you want you can send me your tags with the results of my tuts to: newartisticdreams@gmail.com
Thank you for try this and the others tuts.
This tutorial was writting by me, Mariel - ©Artistic Dreams on 5th of october of 2009 any resemblance to any other tutorial is completely coincidental
Mariel - ©Artistic Dreams
domingo, 4 de octubre de 2009
Tut "Think Pink"

For this tutorial you will need the following things:
First of all the beautiful scrap kit from "La Carolita Designs" called "Thinking Pink", is a freebie and you can download the kit HERE.
The tube is a girl from ©Suzanne Woolcott and you can purchase her art HERE.
The Template # 35 is from Babe's Designz and you can download HERE.
Let's begin:
1.- Open your template in your PSP, duplicate and save the original.
2.- Now select the backgrownd layer and delete, do the same with the credits layer.
3.- Now with your magic wand select the middle circle, then copy and paste as new layer Paper 3, go to selection/invert and then Edit/Cut.
4.- Now select the doodle and the stitch, and apply drop shadow 1 - 1 - 90 - 9,9, with black colour.
5.- Now colorice the last layer Dye: 240, Saturation: 144.
6.- Copy and paste as new layer bow 4, resize to 20% and apply the same drop shadow as before.
7.- Copy and paste as new layer the Gorjuss tube, resize to convenience and apply drop shadow as before.
8.- Copy and paste as new layer ivy, resize to 20%, duplicate once and then reflet one of them, apply drop shadow as before.
9.- Copy and paste as new layer buttonbelieve, resize to convenience, and apply the same drop shadow.
10.- Copy and paste as new layer Flower 2, resize to 40% or less, apply drop shadow as before, duplicate once and reflet.
11.- Merge all visible layers, resize your tag to 75% and add your licence number and your name, I use font: Brush Script MT, size: 48, colour outside: black, colour inside: #A02C56, apply the same drop shadow as before but now with white colour.
12.- Save as png.
It's done.
I hope you like this tut.
I love to see all your results, if you want you can send me your tags with the results of my tuts to: newartisticdreams@gmail.com
Thank you for try this and the others tuts.
This tutorial was writting by me, Mariel - ©Artistic Dreams on 4th of october of 2009 any resemblance to any other tutorial is completely coincidental.
Mariel - ©Artistic Dreams
jueves, 1 de octubre de 2009
miércoles, 30 de septiembre de 2009
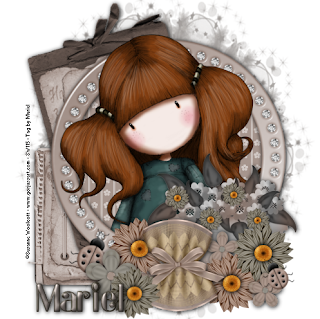
Tut "Lady Bug"

For this tutorial you will need the following things:
First of all the beautiful scrap kit Freebie from Designs by Ali, called "Caring Carrie", you can download the kit HERE.
The wonderful tube is a girl from ©Suzanne Woolcott, and you can purchase her tubes and licence HERE.
The mask # 18 from Babe's Designz is HERE.
Let's begin:
1.- Open a new raster layer of 500 x 500 pixels.
2.- Copy and paste as new layer Paper 3, now go to masks/new mask/from an image, and apply the mask to the paper layer. Then go to masks/delete mask and then resize this layer to 110%.
3.- Copy and paste as new layer Journaling 2, and resize to 50%, then rotate free 15 degrees to the left. Apply drop shadow of choice.
4.- Copy and paste as new layer Journaling 1, resize to 50%, and put as you can see in my tag, now apply the same drop shadow as before.
5.- Copy and paste as new layer Frame 3, resize to 50%, with your magic wand select into the frame, go to selection/modify/expand 4. Then copy and paste as new layer Paper 9, go to selection/invert and then Edit/cut, move the paper layer below the frame layer. Apply drop shadow to the frame.
6.- Copy and paste as new layer the ©Gorjuss girl, resize to 75%, and duplicate the layer. Reserve this layer until the end.
7.- Copy and paste as new layer Flower pot 2, resize to 50%, apply drop shadow as before. Now copy and paste as new layers all the flowers of your choice, I used daisies 1 and 2, duplicate and resize to convenience, do the same with the crochet bow 1, resize to convenience, apply drop shadow as you used before.
8.- Copy and paste as new layer some other flowers, and the Lady Bug, resize to 25%, and rotate free 25 degrees to the right. Now duplicate once, and reflet, resize this one to 85% and put both as you can see in my tag.
9.- Now move the copy layer of your ©Gorjuss girl forward all the other layers, with your lace tool select all what you want to delete in this tube, and then go to edit/cut. You can see the girl below and through the frame.
10.- Now merge all visible layers, and add your licence number and your name, I used Font: Katarina, size: 48, colour outside: #443D2F, colour inside: #B5A7A1. Apply inner bevel of choice, and the same drop shadow as you used before.
11.- Save as png.
It's done.
I hope you like this tut.
I love to see all your results, if you want you can send me your tags with the results of my tuts to: newartisticdreams@gmail.com
Thank you for try this and the others tuts.
This tutorial was writting by me, Mariel - ©Artistic Dreams on 30th of september of 2009 any resemblance to any other tutorial is completely coincidental
Mariel - ©Artistic Dreams


