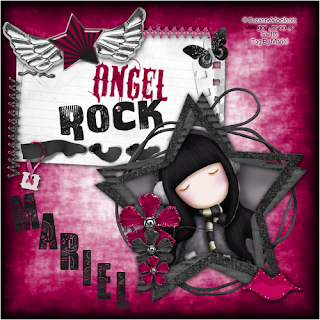
Hi all today a new rocker tag!! woww!!!, I love this kit from Pimp. Thank you sweetie for shared this beautiful work with me.
The tube I used is from ©Suzanne Woolcott, and you can purchase her art HERE.
Let's begin:
1.- Open a new raster layer of 500 x 500 pixels, transparent.
2.- Copy and paste as new layer paper 06. Resize to convenience.
3.- Copy and paste as new layer Notebook - sheet, add drop shadow of choice.
4.- Copy and paste as new layer eyelet 01, resize to 20%, rotate 90 degrees. Add the same drop shadow as before.
5.- Do the same with eyelet 02, but do not rotate this layer.
6.- Copy and paste as new layer wing-charm. Add drop shadow.
7.- Copy and paste as new layer wa-03, resize to 20%, rotate free 5 degrees to the right. Do the same with wa-01, resize to 50% and rotate free 5 degrees to the left.
8.- Copy and paste as new layer star-brad-02, resize to 40% and rotate free 10 degrees to the left. Put this layer as you can see in my image.
9.- Copy and paste as new layer rope-01, and then copy and paste as new layer frame-07, resize to 70%, with your magic wand select into the frame, go to selection/modify/expand 3.
10.- Copy and paste as new layer the ©Gorjuss image, resize this layer to 80%, go to selection/invert, and then Edit/Cut, and put this layer below the star frame. Add some drop shadow to the frame.
11.- Copy and paste as new layer flower-02, resize to 30%, layers/duplicate layer, resize this second layer to 50%. Now copy and paste as new layer flower-04, resize to 20%, and put the three flowers layers as you can see in my image. Add drop shadow as before.
12.- Copy and paste as new layer lips, resize to 20%. Put this image as you can see in my tag.
13.- Copy and paste as new layer butterfly, resize to 25%, then rotate free 10 degrees to the left, and add drop shadow of choice.
14.- Copy and paste as new layer tag, resize to 10%, with your eraser tool, delete in the lace all what you need and put as you can see in my tag.
15.- Add the licence number and the copyright, and then merge all visible layers.
16.- Now write your name with the alpha provided with your scrap kit, paste as new layers and resize one by one the letters to convenience and then again merge all visible layers.
17.- Save as png.
It's done.
I hope you like it. I love to see all you result, if you want you can send me your tags with the results of my tuts to: newartisticdreams@gmail.com
Thank you for try this and the others tuts.
This tutorial was writting by me, Mariel - Artistic Dreams© on 28th of march of 2009, any resemblance to any other tutorial is completely coincidental.
Mariel - ©Artistic Dreams


No hay comentarios:
Publicar un comentario