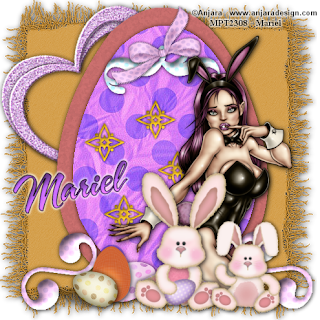
Hi, I'm with this new tut, hope you like it. I used the beautiful scrap kit from Paci, called "Easter Tale", it's a freebie and you can download the kit in her blog HERE.
The tube is from My PSP Tubes, is the beautiful art from ©Anjara, you can purchase a licence and this tube HERE.
The wonderful egg template, is from Lorna's blog, and you can download her templates HERE. It's template # 4.
Let´s begin:
1.- Open a new raster layer of 500 x 500 pixels, transparent.
2.- Copy and paste as new layer, the paper # 2 from Paci scrap kit. Resize to 40%. Colourize with this settings: 26 - 155.
3.- Now open Lorna's template in your PSP. Select one by one the layers and choose diferents paper to complete the egg's colours. Play with the colours of the scrap kit papers. Look my image for help.
4.- In center doodles and bottom doodles, once you colourize, apply effects/3d/inner bevel of choice.
5.- Copy and paste as new layer, the bow ribbon # 5, resize to 15 %.
6.- Resize the star center layer, to 50%, duplicate this layer four times. Put this layers as you can see in my image.
7.- Copy and paste as new layer the Heart_ornament, resize to 60%. Rotate 45 degrees to the left. Duplicate this layer, and rotate again but now just 15 degrees to the right. Put both layers forward the last yellow paper as you can see in my image.
8.- Copy and paste as new layer the ©Anjara girl bunny. Resize to convenience.
9.- Now copy and paste as new layers the bunnies from Paci's scrap kit, resize too, and put them as you can see in my image. Then I put eggs # 1, # 2 and # 3 in different positions, resized to convenience, but you can play with other elements from the scrap kit.
10.- Add drop shadow of choice, to all the elements, write your licence number and merge all visible layers.
11.- Write your name, I used: A&S Snapper Script, size: 48. Colour outside: Black, colour inside: Lilac. Choice one to match with papers from tag. Add some inner bevel of choice. And rotate 10 degrees to the left. Add drop shadow as before.
12.- Save as png.
It's done.
This tutorial was writting by me, Mariel - Artistic Dreams© on 6th of march of 2009, any resemblance to any other tutorial is completely coincidental.
Mariel - ©Artistic Dreams


No hay comentarios:
Publicar un comentario