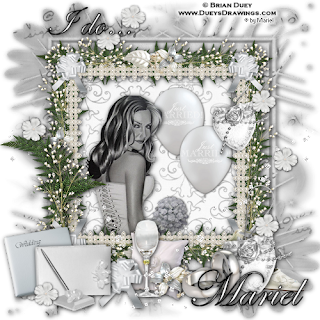
Hi all, today I write this tut and remember one of my best moments in my life, my wedding...That's so romantic and lovely, and all the people who knows me, know about my love with the man who is my Hubby today. Hope you like the tut as I like it.
Well for this tut you will need the following things:
The romantic and wonderful scrap kit from Designs by Ali, called "I do......", is a PTU, and you can purchase this kit in her blog HERE.
The tube is a freebie from ©Brian Duey, you can download his beautiful tubes HERE.
The mask #20 is HERE.
Let's begin:
1.- Open a new raster layer of 500 x 500 pixels.
2.- Copy and paste as new layer DBA_Paper 16, resize to 80% twice. Open your mask # 20 in your PSP, go to masks/new mask/from and image. Apply the mask to the paper layer, and then go to masks/delete mask.
3.- Copy and paste as new layer DBA_Frame # 2, resize to 40%. Now with your magic wand select into the frame and then got to selection/modify/expand 5.
4.- Copy and paste as new layer DBA_Paper 8, resize to 60 %. Go to selection/Invert selection, and then Edit/Cut. Put this layer below the frame layer.
5.- Copy and paste as new layer DBA_Wedding Baloon 1, resize to 20%, duplicate layer, and add drop shadow of choice. Put this layers as you can see in my image.
6.- Now copy and paste as new layer the ©Brian Duey tube, resize to convenience, and add drop shadow as before.
7.- Copy and paste as new layer DBA_Wedding Bouquet, resize to 20%, image/rotate free 10 degrees to the right. Put this layer below the frame, in girl hand, and with your eraser tool, delete all what exceed the frame.
8.- Copy and paste as new layer DBA_Fern 1, resize to 20%, put this layer as you can see in my image, go to layers/duplicate layer, and reflet. Move this layer a bit below, and with your eraser tool delete the stem.
9.- Copy and paste as new layer DBA_Flower 3, resize to 25% and put forward the last fern layer.
10.- Now you are going to add all the elements at foot of the frame. Copy and paste all of them as new layers. I used the following elements:
- DBA_Wedding album 2, resize to 50%.
- DBA_Weeding Book 1, resize to 25%.
- DBA_Wedding Bow 1, resize to 25%.
- DBA_Wedding Cushion 1, resize to 20%.
- DBA_Wedding Glass 3, resize to 20%.
- DBA_Wedding Broche 3, resize to 20%.
- DBA_Silver Wedding Band 1, resize to 25%, duplicate layers and rotate free this one 90 degrees.
- DBA_Wedding Shoe 1, resize to 20%.
- DBA_Wedding Silver Heart Charm 1, resize to 20%.
Now add drop shadow to all the elements.
11.- Copy and paste as new layer DBA_Perl Flower 3, resize to 13%, duplicate this layer seven times, and put all the lfowers in your tag as you can see in my image, around the frame. Add drop shadow.
12.- Copy and paste as new layer DBA_Glitter 1, resize to 50%, duplicate layer and reflet.
13.- Write the copyright of your tube and merge all visible layers.
14.- Choose a charming font, I used: Edwardian Script ITC, size: 60, colours black and white, use drop shadow as before.
15.- Save as png.
It's done.
I hope you like it. I love to see all you result, if you want you can send me your tags with the results of my tuts to: newartisticdreams@gmail.com
Thank you for try this and the others tuts.
This tutorial was writting by me, Mariel - Artistic Dreams© on 27th of march of 2009, any resemblance to any other tutorial is completely coincidental.
Mariel - ©Artistic Dreams


No hay comentarios:
Publicar un comentario