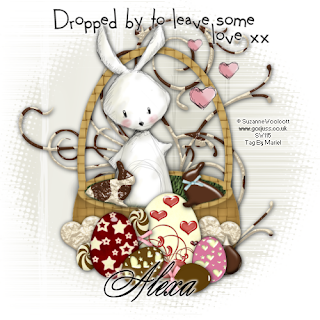
Hi all, here again with new tut, this one is dedicate to my beautiful friend Alexa, who gifted to me with all the scrapkits from ScrappingMar, thank you sweetie!!!. This tut is for you, hope you like it.
Well, for this tag you need to download two of the freebies kits from ScrappingMar, one called "Chocothings" and the other called "Easter". You can download both freebie kits in Mar's blog.
The tube is taken from the beautiful element's pack of ©Suzanne Woolcott, called "Bears and Bunnies", you can purchase her art and a number of licence, HERE.
Let's begin:
1.- Open a new raster layer of 500 x 500, transparent.
2.- Take a paper of choice from the elements ©SuzanneWoolcott pack. Select and paste as new layer.
3.- Open your mask in psp, go to masks/new mask/from an image, and select your image mask.
Then go to mask/delete mask.
4.- Open in psp from "Easter" scrap kit, the empty basket, and all the eggs.
5.- Copy and paste as new layer the empty basket tube, resize to 50%.
6.- Coy the eggs and resize someones to 50% and others to 25%. Rotate 50 degrees to the left one of them, and other to the right. You can play with your imagination, and add others elements than me. Look my image for a guide.
7.- Open "Chocothings" kit, and play again with the elements, then select "chocobunny 3" and "chocobunny". Copy and paste as new layers. Put them into the basket, resize to 15%, and delete all what exceed from basket limits. Reflet on of them.
8.- Select "chocodooldle 2", copy and paste as new layer below the basket tube. Then resize to 60%. Add a drop shadow of choice.
9.- Select a tube from the pack, I used one of the bunnies, then copy and paste as new layer. See my image for help.
10.- Copy and paste the heart from the tube's pack, and paste as new layer, duplicate once time, and resize to 75%, the again duplicate this resized layer, and resize to 75% the last layer.
11.- Add drop shadow to elements, tube and basket.
12.- Add your liecence number. And then merge all the visible layers.
13.- Write your name, I used font: Splendid Ornamenty. Size: 48, colour black. Add effects/Eye Candy 4000/Corona/colour white, with default settings.
14.- If you want to add the message from the word art, just copy and paste as new image, as you can see in model, and add the same effect than used before.
It's done. Hope you like it. Thank you for try my tuts, I'm happy if you want to show your results, please you can write me, to my mail: newartisticdreams@gmail.com
This tutorial was writting by me, Mariel - Artistic Dreams© on 20th february of 2009, any resemblance to any other tutorial is completely coincidental.
Mariel - ©Artistic Dreams


No hay comentarios:
Publicar un comentario